
Fortigate IPSEC remote access VPN is a secure, easy-to-configure VPN solution that allows remote access for telecommuters to securely access resources that are available on a corporate network. It uses the cryptographic dexterity of the IPSEC and can be configured to use pre-shared keys or SSL certificates.
In this post I will be sharing with us on how to implement the Fortigate IPSEC remote access vpn using pre-shared keys. Once the VPN is fully setup, we will download and configure the Forticlient VPN client application that allows endpoints to successfully connect to a Fortigate VPN server.
VPN user group
Before configuring the VPN gateway, it is recommended that you create a user group. This is the group of users that will be allowed through the VPN. It is as simple as creating users and assigning them to a group. Click on “user and authentication”, then click on user groups, give your group a name. After that, go to user definition, create new users and assign the users to the user group you created.
You may also like: Sophos connect VPN setup on Sophos XG firewall
Fortigate IPSEC VPN Configuration
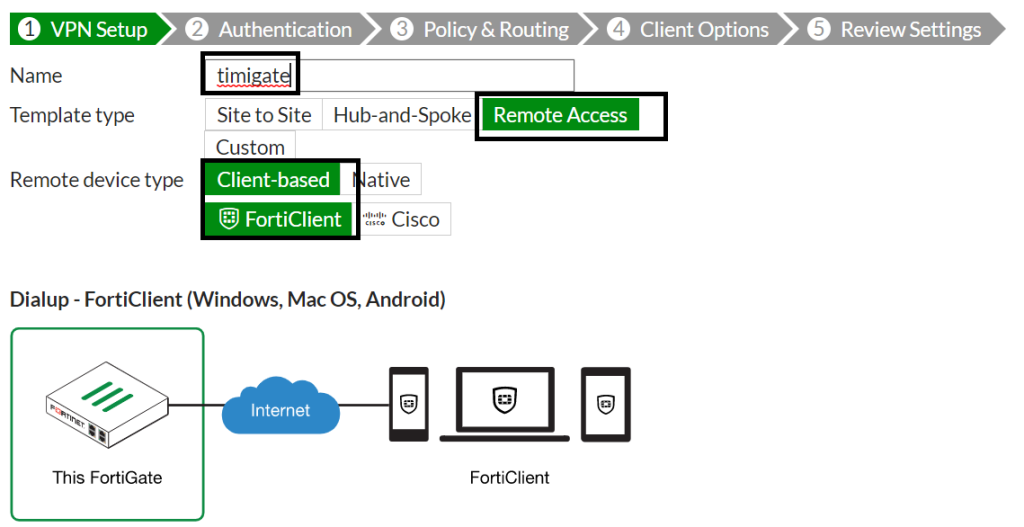
The configuration of the Fortigate IPSEC remote access VPN is easy because the steps are pretty much self-explanatory. Simply click on VPN then click on IPSEC tunnels. On the page that appears, click on create new and select IPSEC tunnel. Enter a name for your VPN tunnel, select remote access and click next. See image below.
On the page that appears next, select the interface that will receive VPN connection requests (this will be your WAN interface configured with a public IP), select pre-shared key, enter your pre-shared key, select the VPN user group you created in step one and click next.

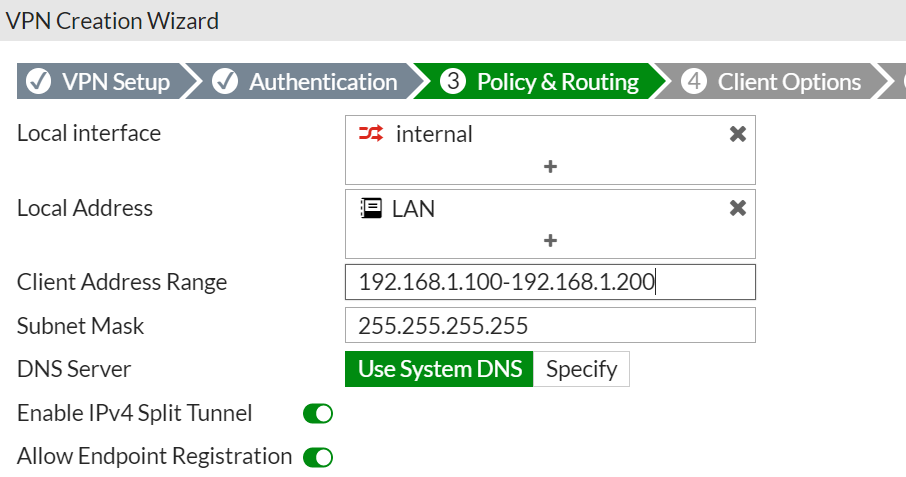
On the page that appears next, add your local interface, select the addresses that VPN users are allowed to communicate with, enter the range of addresses to be assigned to VPN users, and you can statically specify a DNS server IP for VPN users or leave everything else as shown in the image below and click next.
The page that appears next has nothing much for you to do. You can simply click next or chose not to allow VPN users save their passwords or allow them to auto connect. Click next, review your configuration as shown to you and click on create.
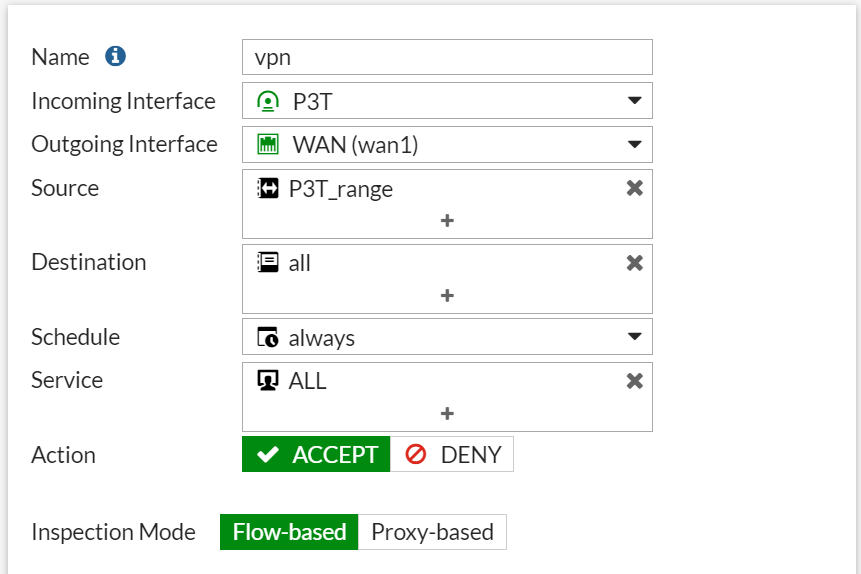
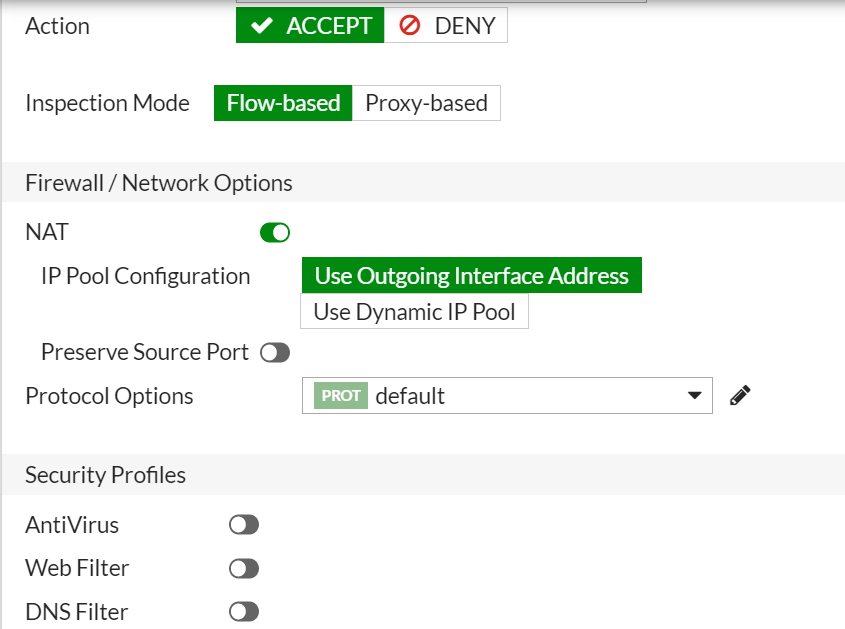
Finally, on the Fortigate VPN configuration, create a firewall policy to allowed successfully connected VPN users to access the internet via the VPN server. If the goal is simply to allow them access to internal network only, then this step is not required. However, if you want them to access the internet via their VPN connections, then go to policy and objects, then firewall policy and create a new policy. See below images for guide.
On the client’s PC, download Forticlient, and create a new connection. The below image shows the steps for setting up a new Forticlient IPSEC VPN connection.

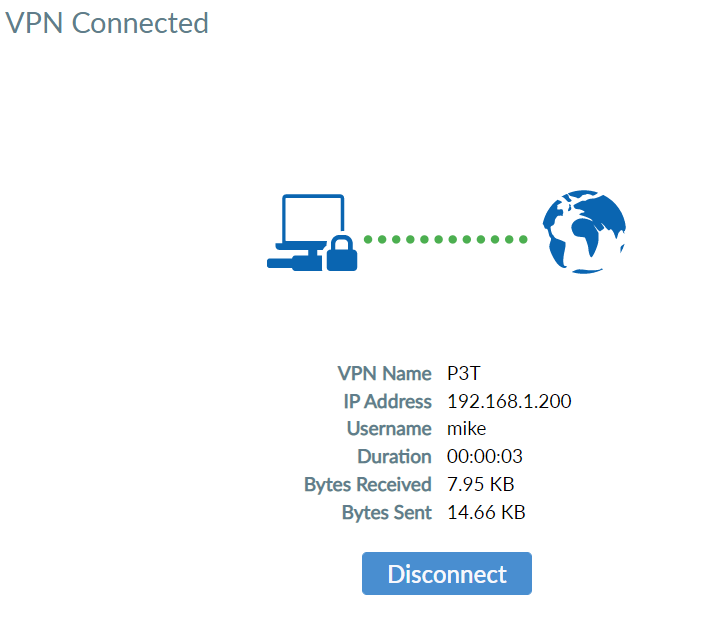
Now, click on the connection that was created above, enter a username and password and connect. Note that username and password must have been created and added to the allowed VPN group.
Fortigate IPSEC remote access VPN is a secure easy to configure VPN solution that allows remote access for telecommuters to securely access resources that are available on a corporate network. It leverages on the cryptographic dexterity of the IPSEC and can be co