
Fortigate initial configuration for internet access is a straightforward process that involves a few commands, if you are using the CLI, or a few clicks if you are using the GUI. As simple as the steps may be, the user must have an understanding of what needs to be done to be able to accomplish them.
The Fortigate initial configuration for internet access can be broken down into three compulsory tasks, namely IP address assignment, default route configuration, and firewall policy. These three primary tasks must be configured for connected users to have access to the internet via a Fortigate. Let’s go through the configuration one task at a time.
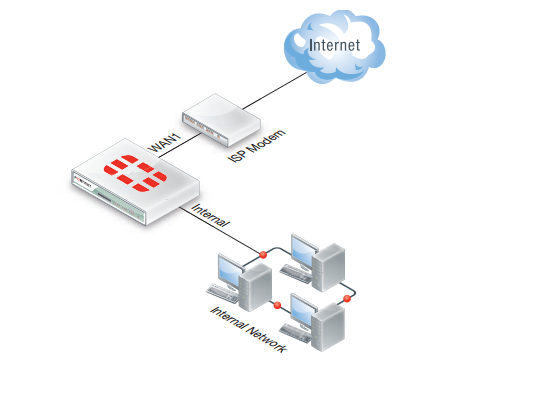
Fortigate initial configuration
Although the Fortigate initial configuration includes the configuration of system name, login credentials, allowed access, etc., these tasks are purely administrative and not form parts of the configuration requirements for users to have access to the internet. For internet access, I will focus on the three steps earlier mentioned.
You may like: Mikrotik configuration step by step.
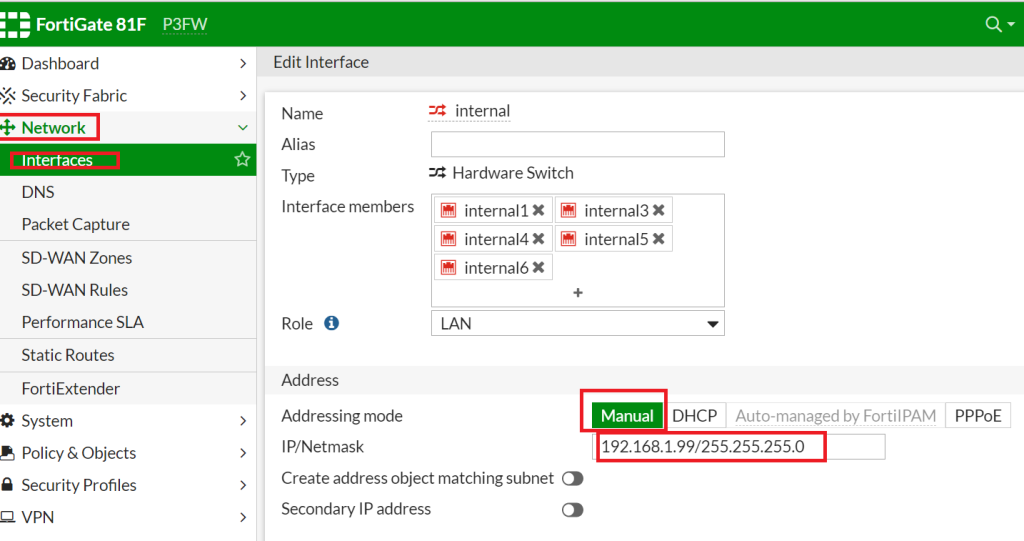
Fortigate IP address assignment
To assign IP, navigate to network, interface, double-click on any interface to assign an IP. Select manual for static IP or DHCP if your ISP has DHCP server configured for you. Check any of the access types for administrative tasks. Note that you need to have IP addresses configured for your WAN and LAN interfaces and confirm reachability from your Fortigate to your gateway (ISP) address. See below image for guide.
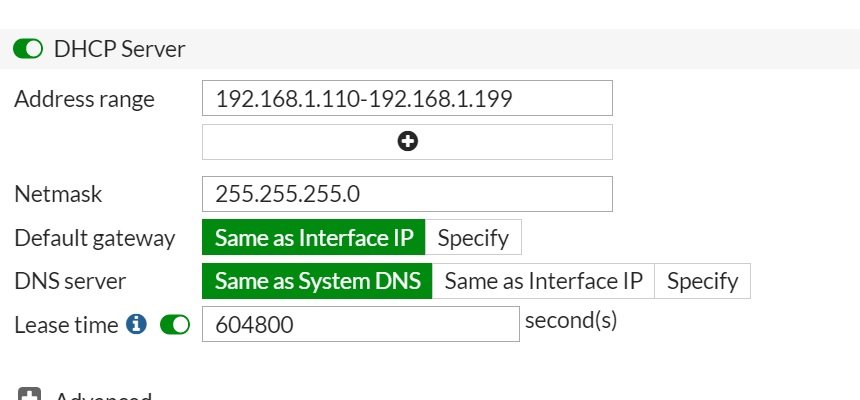
You can make your Fortigate a DHCP server by enabling the DHCP server feature for LAN users.
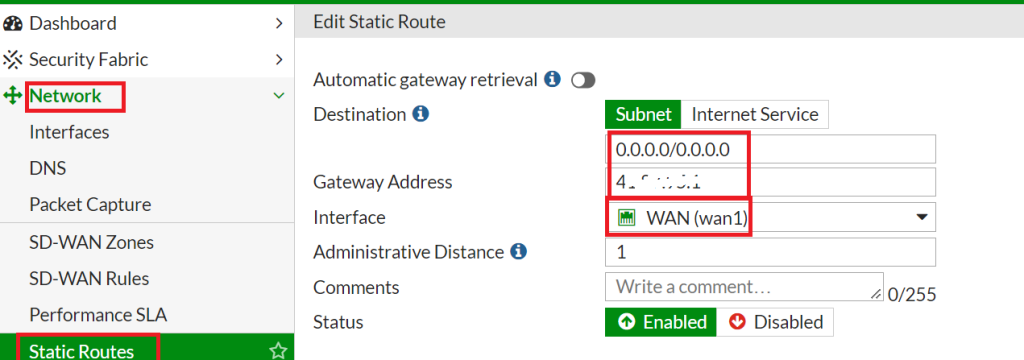
Fortigate Static Default route
Next, we configure default route to direct internet-bound traffics to the ISP. Click on network, static route, create new static router and enter details as shown in the image below.
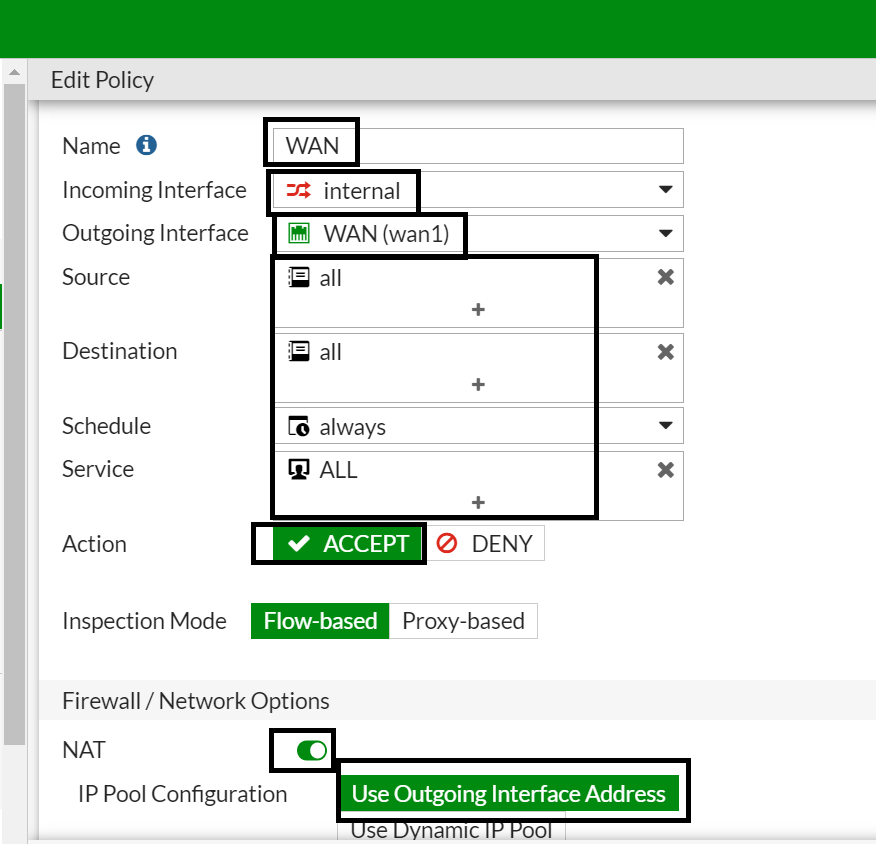
Fortigate NAT configuration
The final step is the configuration of firewall policy for network address translation (NAT). To do this, click on policy and object, firewall policy, and create new. Enter a name for your rule, set incoming interface to your LAN interface, outgoing to your WAN, source to all or specific address list if you wish to restrict internet access to selected addresses. Enable NAT to WAN address or to a dynamic pool if you have a pool of public IP. In my case, I do not have a pool of dynamic IP hence, NAT to the WAN interface address. Ensure that the policy is enabled before clicking ok. See image below for guide.
If you followed to this point, congrats! You have done the Fortigate initial configuration to allow connected users access to the internet. Now, establish your cable connectedness and try to access the internet from any of your LAN PCs or execute a ping to the internet from your Fortigate, sourcing from the IP address configured on your LAN interface.
If you enjoyed this tutorial, please subscribe to this blog to receive my posts via email. Also subscribe to my YouTube channel, like my Facebook page and follow me on Twitter.