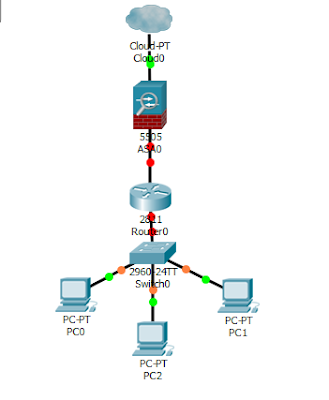
The Cisco ASA firewall is a highly sophisticated piece of network gear that is required to provide a shield on your network. When deployed on a network, preferably between your router and the the ISP equipment, it prevents access from the less secured interface (WAN) to the most secured interface, e.g. the LAN and the DMZ. Despite its usefulness, configuring the ASA has always been perceived as a difficult task, especially by CCNA holders who are yet to go for the CCNA-security certification classes. In this post, we look at the initial configuration needed to get the ASA firewall up and running. For this demonstration, we will be using the Ciso ASA 5505 on Packet Tracer 7.0 and our task will be divided into the following steps:
>>Logging into the ASA 5505 firewall
>>Assigning IP addresses to interfaces
>>Configuring default routes
>>Configuring NAT
Logging into the ASA: the Cisco ASA can be accessed via theconsole port. This gives you access to the CLI where you will be prompted for password. This is where some users get confused since they are sure no password has been set. At this point, you are to hit the enter key without typing a password.
Assigning IP addresses: IP address assignment on the ASA is a little different from what some users are already used to on a Cisco router. Here, addresses are assigned to Vlan interfaces and NOT to physical interfaces as obtainable on Cisco routers. The ports on the Cisco ASA 5505 are grouped into two Vlans, by default. These are Vlan1 and Vlan2. Ether0/0 belongs to Vlan2 which is labeled as the outside interface; meaning the interface connecting to the ISP. Ether1 to Ether7 are bundled together into Van1 are labeled the inside interface. This interface connects to your internal network.
To view the interfaces on the ASA, type the command #sh switch vlan from the privilege mode and an output similar to the one below will be displayed.
To assign an IP to Vlan1, the following commands must be typed in from the global config mode:
ciscoasa#conf t
ciscoasa(config)#int vlan1
ciscoasa(config-if)#ip add 192.168.1.1 255.255.255.0
ciscoasa(config-if)#no shut
ciscoasa(config)#int vlan1
ciscoasa(config-if)#ip add 192.168.1.1 255.255.255.0
ciscoasa(config-if)#no shut
ciscoasa(config-if)#
For Vlan2 ( the inside interface), a similar command, as shown below, must be entered.
For Vlan2 ( the inside interface), a similar command, as shown below, must be entered.
ciscoasa#conf t
ciscoasa(config)#int vlan2
ciscoasa(config-if)#ip add 192.168.2.1 255.255.255.0
ciscoasa(config-if)#no shut
ciscoasa(config)#int vlan2
ciscoasa(config-if)#ip add 192.168.2.1 255.255.255.0
ciscoasa(config-if)#no shut
ciscoasa(config-if)#
Configuring default route: default routes configuration is a bit different on the ASA compared to the way it is done on conventional Cisco routers. To configure a default route to the ISP gateway on the Cisco ASA 5505 firewall, commands similar to the ones below must be entered:
ciscoasa(config)#route outside 0.0.0.0 0.0.0.0 197.210.202.1
Route is the action word, outside is the exit interface, 0.0.0.0 represents the destination network, the second 0.0.0.0 represents the destination subnetmask, while 197.210.202.1 is the gateway.
NAT configuration: this also is different from the way it is done on normal Cisco routers. We are used to creating an access-list that matches the IP addresses to be included in the NAT and statically defining the inside and outside interfaces. On the ASA, commands similar to the ones below are needed.
ciscoasa(config)#object
network inside-subnet
network inside-subnet
ciscoasa(config-network-object)# subnet 192.168.2.0 255.255.255.0
ciscoasa(config-network-object)# nat (inside,outside) dynamic
interface
interface
The Cisco ASA uses reflexive access-lists to allow traffics originated from the LAN to come back to the network via the WAN port. This same ACL ensures that traffics not originating from the internal network are not allowed through the router. Exceptions to these rules can however be created depending on user requirements, e.g, allowing VPN connection through
the firewall.
the firewall.
Thanks for reading this post and do not forget to follow me across all my social media platforms.


Good job,being enjoying your blog especially the labs.
Many thanks for sharing you knowledge with others.
Thank you,Ejiro