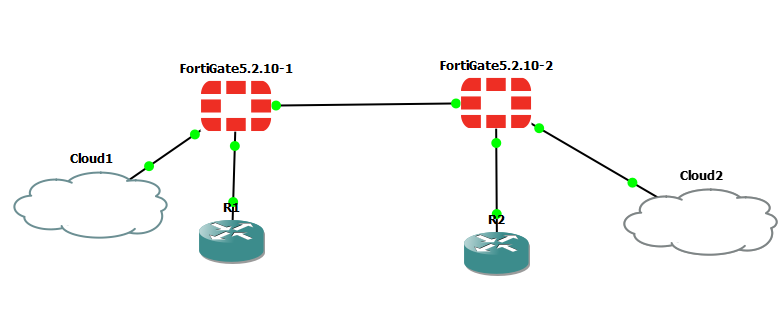
Fortigate command line IP address assigment is one of the tasks you need to perform when configuring a Fortigate device on GNS3 or if you a CLI-lover. To get your Fortigate device to comunicate with your GNS3 VM and allow you access via the GUI, you will need to first access your the device via the command line and configure your management interface with a static or dynamic address via the CLI.
The GNS3 emulation software is one of the platforms where you can practice and master your Fortinet skills. Even though the FortiOS running on the GNS3 platform is an evaluation version, it is just enough to get you started with all you need to perfect most of the skills required to configure and deploy any Fortigate model.

Fortigate Command line IP Address
The Fortigate command line IP address configuration process is a fairly straight forward process just like you have it with most router OS platforms. First, you have to go into interface configuration mode, then to the particular port you want to confgure. Once there, you can decide whether your Fortigate IP address is going to be static or dhcp. Here, we are going to go with dhcp. The steps for both options are pratically thesame. See commands below
FortiGate-VM64-KVM #config system interface
FortiGate-VM64-KVM #edit port3
While in the selected port mode, it would be good to verify that there is not IP address configured on the port before proceeding to assign your preferred IP address. To see the IP address on an interface, just issue the command “get” command from the port mode. See command and output below.
You may like: step-by-step guide to configuring a Mikrotik router
FortiGate-VM64-KVM (port3) # get
name                : port3
vdom                : root
cli-conn-status     : 0
mode                : static
dhcp-relay-service  : disable
ip                  : 0.0.0.0 0.0.0.0
allowaccess         :
The output above shows that port3 has no configured IP address. I will now proceed to configure an IP on it via dhcp and define the access types. For this lab, I am going to allow ping and https. See commands below.
FortiGate-VM64-KVM #config sys interface
FortiGate-VM64-KVM (interface) #edit port3
FortiGate-VM64-KVM (port3) #set mode dhcp
FortiGate-VM64-KVM (port3) #set allowaccess ping https
Verify Fortigate IP address assignment
In the interface configuration mode, in the selected port mode, type get to see the ip address and access types configured on the interface. See command and output below.
FortiGate-VM64-KVM (port3)#get
name : port3
vdom : root
cli-conn-status : 2
mode : dhcp
distance : 5
priority : 0
dhcp-relay-service : disable
ip : 192.168.171.129 255.255.255.0
allowaccess : ping https
Finally, ensure that your cable connectedness is done properly, then you are good to go.
If you enjoyed this tutorial, please subscribe to this blog to receive my posts via email. Also subscribe to my YouTube channel, like my Facebook page and follow me on Twitter.
