
If you are a network engineer/administrator who desires a highly secured, yet, free and easy-to-deploy application that allows you to securely monitor users’ bandwidth utilization as well as device status on your network, then this post is for you. While there are lots of materials out there on how to add devices to Cacti, none has clearly demonstrated how to add a Mikrotik snmp version 3 device to Cacti. In this demonstration, I will share with us on how to add a Mikrotik snmp-version-3-enabled device and create graphs of utilization for connected users.
Cacti is an open source application that allows network engineers/administrators to monitor utilization on any active interface of a connected network device. It is a complete networking graphing solution that is designed to leverage on the powers of the Simple Network Management Protocol (SNMP) and presents users with a solution for monitoring network resource utilization. Cacti has supports for snmp versions 1, 2, and 3. As good as snmp is, it has often presented attackers with backdoors to hack into enterprise networks. While the security provided by snmp versions 1 and 2 ends with the changing of default snmp community name from public to something else, they do not provide for authentication and encryption. This means that communications between devices running snmp versions 1 and 2 are in plain text and can easily be picked by an attacker. SNMP version 3 on the other hand provides for authentication and data encryption between the server and an snmp client.
Mikrotik supports snmp version 1, 2, and 3. When using snmp version 3 on Mikrotik, users have the option of using MD5 or SHA1 for authentication and DES or AES for encryption.
How to add a Mikrotik snmp version 3 device to cacti
Adding network devices to Cacti can be pretty much easy and straight forward, provided the following have been taken care of:
- The network device to be added to Cacti must be live on the network.
- The network device must be reachable from the Cacti server.
- SNMP version 3 must be enabled on the network device
- The Mikrotik device and the Cacti server must same SNMP version 3
- The same authentication and encryption protocol must be used on both the Mikrotik router and Cacti server
To add a device to Cacti, SNMP must be enabled on that device. Click here for how to enable SNMP on a Cisco router.
Enable snmp version 3 on a Mikrotik router
/snmp community add name=timigate authentication-password=timigate authentication-protocol=MD5 encryption-password=timigate encryption-protocol=DES read-access=yes security=private write-access=no addresses=10.0.0.0/16

The next thing to do is to enable snmp version 3. While enabling snmp version 3, it must be set to use the community created in the step above. See commands below:
/snmp set trap-community=timigate trap-interfaces=ether1 trap-generators=interfaces engine-id=timigate enabled=yes trap-target=10.0.0.17

In the image above, trap-target address is the IP address on the Cacti server, the community created earlier (timigate) is referenced, snmp version is set to version 3, trap- generator is set to interfaces (server will notify us when an interface goes down), the interface being monitored is ether1. That’s all we need to do on the Mikrotik router.
You may also like: How to create accounts and add graphs of utilization for customers in Cacti
Adding a Mikrotik snmp-version-3 device on the Cacti server
To add the Mikrotik snmp-version-3 client configured in previous steps, I will do the following.
- Log on to the Cacti server as an administrator, click on console, then click on device, then click on add. See below:

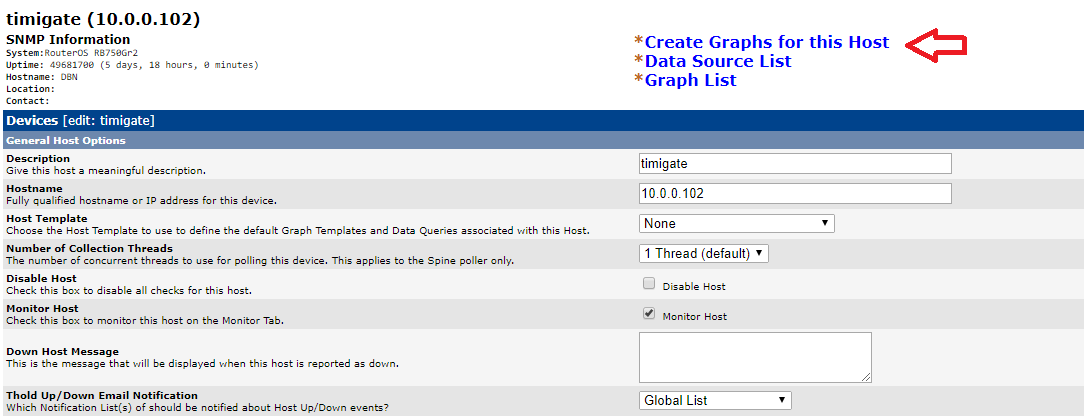
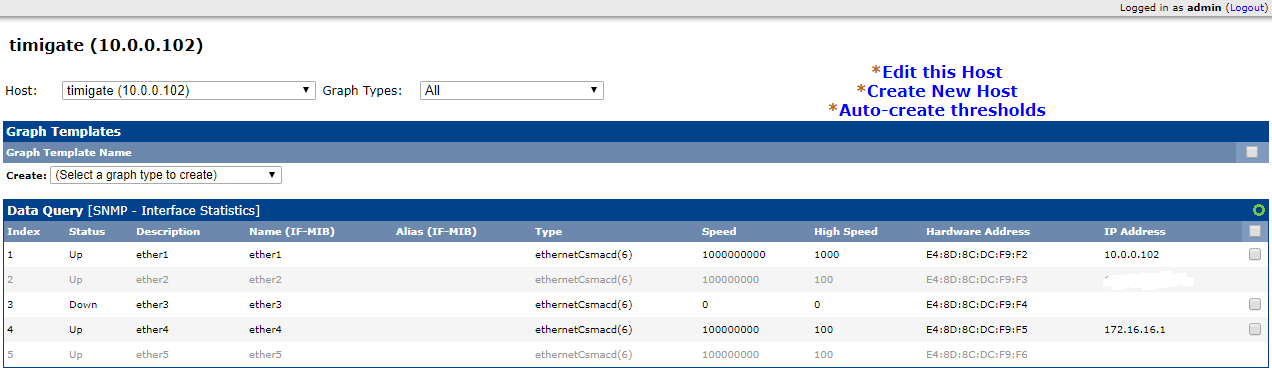
Choose DES for encryption, if that was chosen for encryption on your Mikrotik device. Click on create. After that, scroll down to “add data query” and choose “snmp interface statistics. Click on “add”, scroll down and click on save. On the next page that displays, click on “create graph for this host”, choose the interfaces to graph and click on create. Click on create one more time. You and done.

Click here to download Cacti for free.