Installing and running Mikrotik cloud OS on Eve-ng or Gns3 is one of the best things that can happen to you as a Mikrotik network engineer. Running the powerful Mikrotik cloud OS on a platform like Eve gives you the ability to simulate complex lab environment from the comfort of your office without paying a Penny on hardware and software.
The Eve-ng community edition is a free cross-platform network simulator that allows network engineers to install, configure and test network devices from different manufacturers, thereby giving engineers the power to design and test complex labs on a virtual environment before they are deployed on the field.
To successfully install the Mikrotik cloud OS on Eve-ng, you will need to do four things. Firstly, if you do not have the Vmware workstation already installed, you need to do so. Secondly, download and install the Eve-ng community edition and install in on the Vmware mchaine. Thirdly, you need to download and install the Mikrotik cloud OS from Mikrotik. Make sure it is the stable edition. Lastly, you need to download WinSCP which will be used to upload your Mikrotik cloud OS into Eve-ng. Luckily for you and I, all the software mentioned can be downloaded free of charge! Let’s jump right in.
Because this post is on the installation of Mikrotik cloud os on Eve-ng, I will assume that Eve-ng has been successfully installed on your Vmware machine. Our job here is on how to download and export the Mikrotik cloud os image to Eve-ng. To do this, launch your Eve-ng and access it via Web browser, using the IP address assigned to Eve-ng. Navigate to node templates. You will notice that the Mikrotik node template can not be used because it has no router os in it. Now let’s export the Mikrotik router os into Eve-ng
Uploading Mikrotik cloud OS to Eve-ng
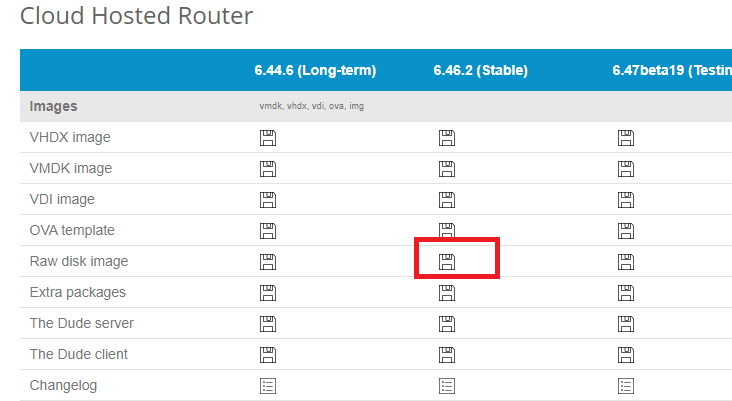
First of all, create a folder on named Mikrotik-4.46.1 on your desktop, if that is the version of Mikrotik that you will be downloading. Then, go to Mikrotik download page and download the Mikrotik cloud os to the folder you just created. Because it’s an image, it will have .img as the extention, eg. chr-6.46.1.img

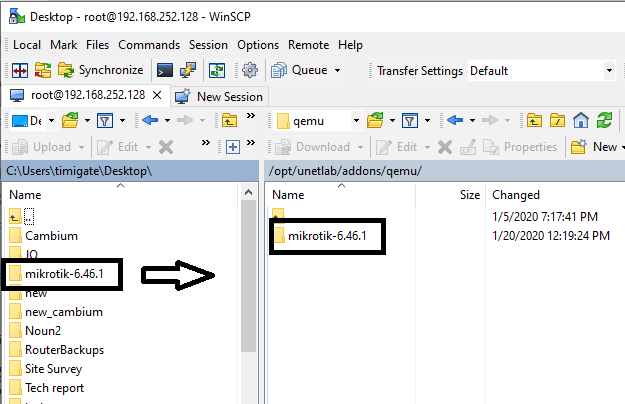
Launch WinSCP and enter the login credentials for your Eveng. Navigate to opt/unetlab/addons/qemu and locate the folder containing the Mikrotik cloud image. Drag the folder to the directory as shown below.

On successful upload, open the uploaded folder in WinSCP and rename the file contained in it from chr-6.46.1.img to hda.qcow2. Finally, Login to your Ev-ng via telnet and enter the commands below to grant permissions. /opt/unetlab/wrappers/unl_wrapper -a fixpermissions.
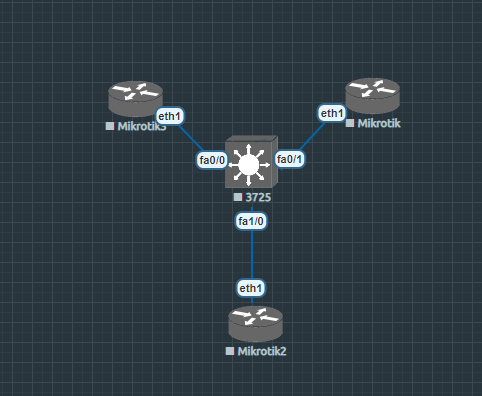
Now, access Eve-ng via your web browser and create a topology using the Mikrotik router. It should work as shown in the image below.

Double-click on Mikrotik router to have access to its command line interface.

If you enjoyed this tutorial, please subscribe to this blog to receive my posts via email. Also subscibe to my YouTube channel, like my Facebook page and follow me on Twitter

Good one bro. Always nice to read your articles.
Keep up the good work!
Thank you, John. Always good to have you here.