The size of a picture matters a lot when filling out a form on some portals. Applicants are always told to make sure their images do not exceed a particular size. For example, an applicant might be told to ensure that the size of the image to be uploaded should not be more than 55KB. For most people, this is a huge problem because the images they have ready for upload are usually bigger than what the portals’ require. When you find yourself in a situation like this, do not freak out, there is a simple way to reduce the size of the image.
The paint application for windows is one of the programs you can use to reduce the size of an image. It is a known fact that the resolution of an image determines its quality. An image with a high resolution will have high pixels, and the higher the pixels, the larger the size of the image. In other words, the higher the pixels, the higher the quality of an image. In reducing the size of an image, the saying that you cannot eat your cake and have is the best way to explain it. When you reduce the amount of pixels in an image, you have reduced the size of that image. So the choice is up to you, reducing the size of an image at the expense of its quality or have a high-quality image at the expense of storage space. Anyway, reducing the size does not necessarily mean a poor image. You can reduce the size of an image and still have a good image, though not comparable to its original version. To reduce the size of an image, take the following steps:
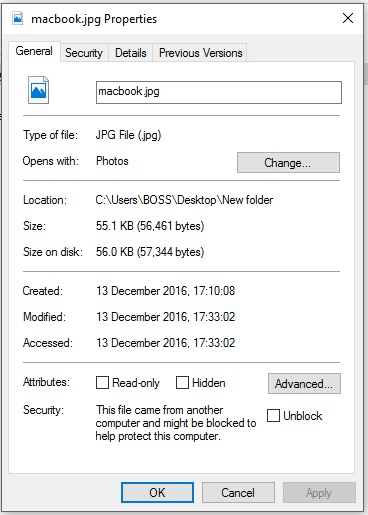
The images below are of a Macbook and its properties showing the size in its original form. To get the size of your image, simply right-click on that image and click on properties.
To reduce the size of this image do the follows:
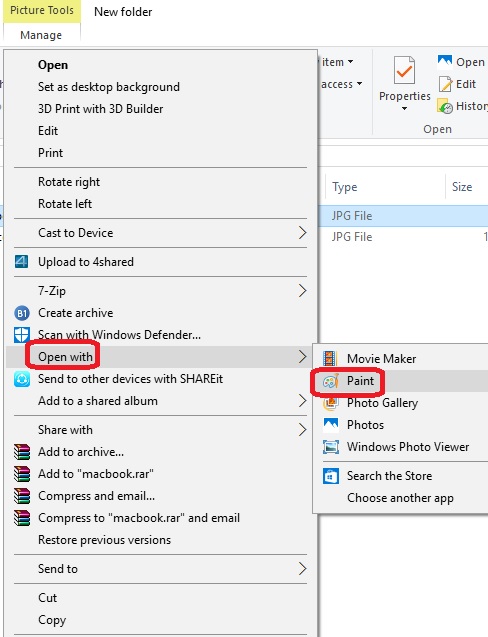
>> Right click on the image
>> Click on “open with”
>>Choose “paint”
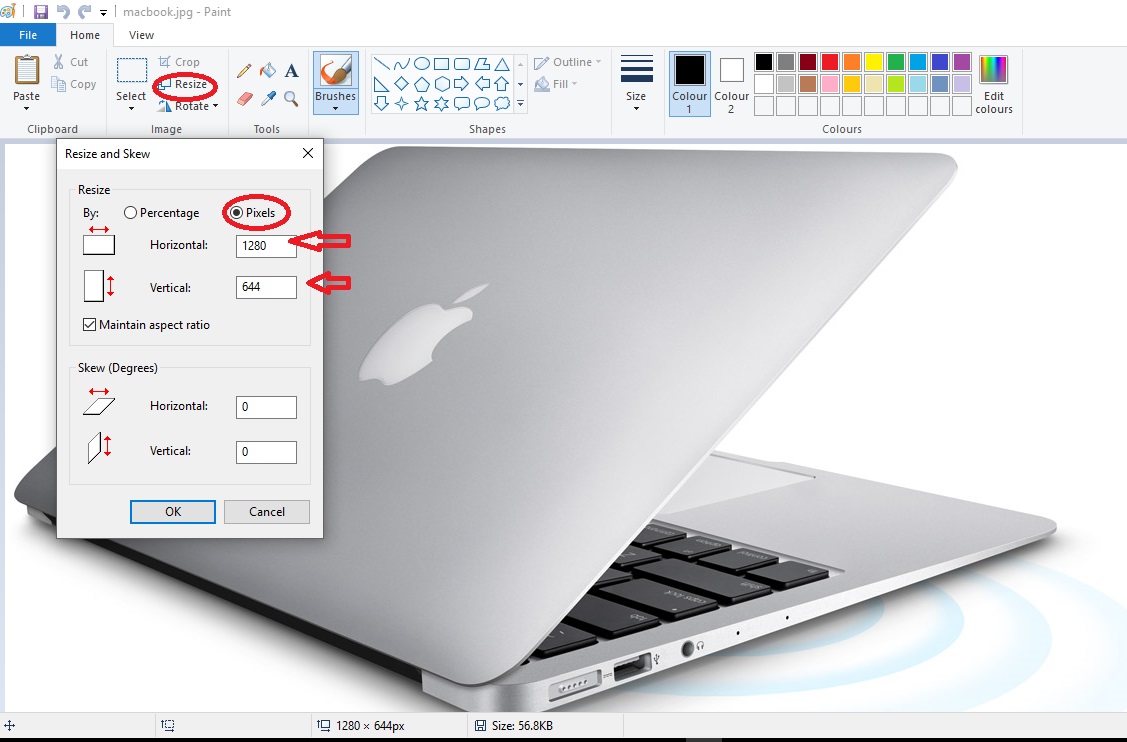
>> Once it is opened in paint, click on resize
>> Choose pixel
>> Then reduce the size by reducing the numbers in the boxes for horizontal and vertical. Actually, when you reduce the number for horizontal, the vertical reduces automatically in proportional to the horizontal. So you do not necessarily need to reduce the number for vertical.
Do not go too low. If the numbers are 1000 and 600, you can lower the horizontal value to 900, and that will automatically reduce the value for vertical. After that, you check the size of the image. If it’s still not down to the size required, you reduce again until you get the required size. Lets see what the size of the image is now that it has been reduced.
From the image above, it is clear that we have been able to reduce the size of this image to 55KB from its original size of 60KB. Below is the reduced version of the image.
So the images still looks great. Very much like the original version.
That is how quick and easy it is to reduce the size of any image using paint. If you have any question on this topic or any other topic for that matter, feel free to drop a comment or use the contact us form, and don’t forget to hit the like button. Thanks for reading and stay safe.
Related