

Hello everyone!
Lets talk about extended access-list. In my previous post, I talked about standard access list ( read here). Extended access-list works with source and destination addresses as well as application port numbers.
I am assuming you already know what application port numbers are.
(adsbygoogle = window.adsbygoogle || []).push({});
When we considered the standard access-list, we observed that it does filtering based only on the sources address. This leaves the standard access-list with so many limitations. To overcome these limitations, the extended access-list is used.
We are going to simulate a real lab environment and effectively implement the extended access-list to solve the problems presented.

We want to deny host 192.168.0.2 telnet access to the router on 192.168.0.1. We will know that our access-list is working if we are unable to telnet to the router from host 192.168.0.2 but can telnet to it from 192.168.0.3. Find below the required configuration:
First of all, lets be sure we can telnet to the router from 192.168.0.2(PC1)

Good enough, we can. So, lets configure an extended access-list.
Router(config)#access-list 100 deny tcp host 192.168.0.2 host 192.168.0.1 eq 23
Router(config)#access-list 100 permit ip any any
Router(config)#int f0/0
Router(config-if)#ip access-group 100 in
Router(config-if)#exit
Router(config)#exit
Router#
%SYS-5-CONFIG_I: Configured from console by console
Router#copy run start
Destination filename [startup-config]?
Building configuration…
[OK]
Lets see if it works
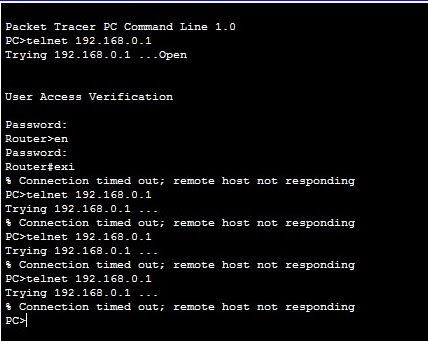

As can be seen in the first image,subsequent attempts to telnet to the router from host 192.168.0.2 after the implementation of the access-list failed but was successful on host 192.168.0.3.
There you have it guys,extended access-list made easy. I hope this helps.