
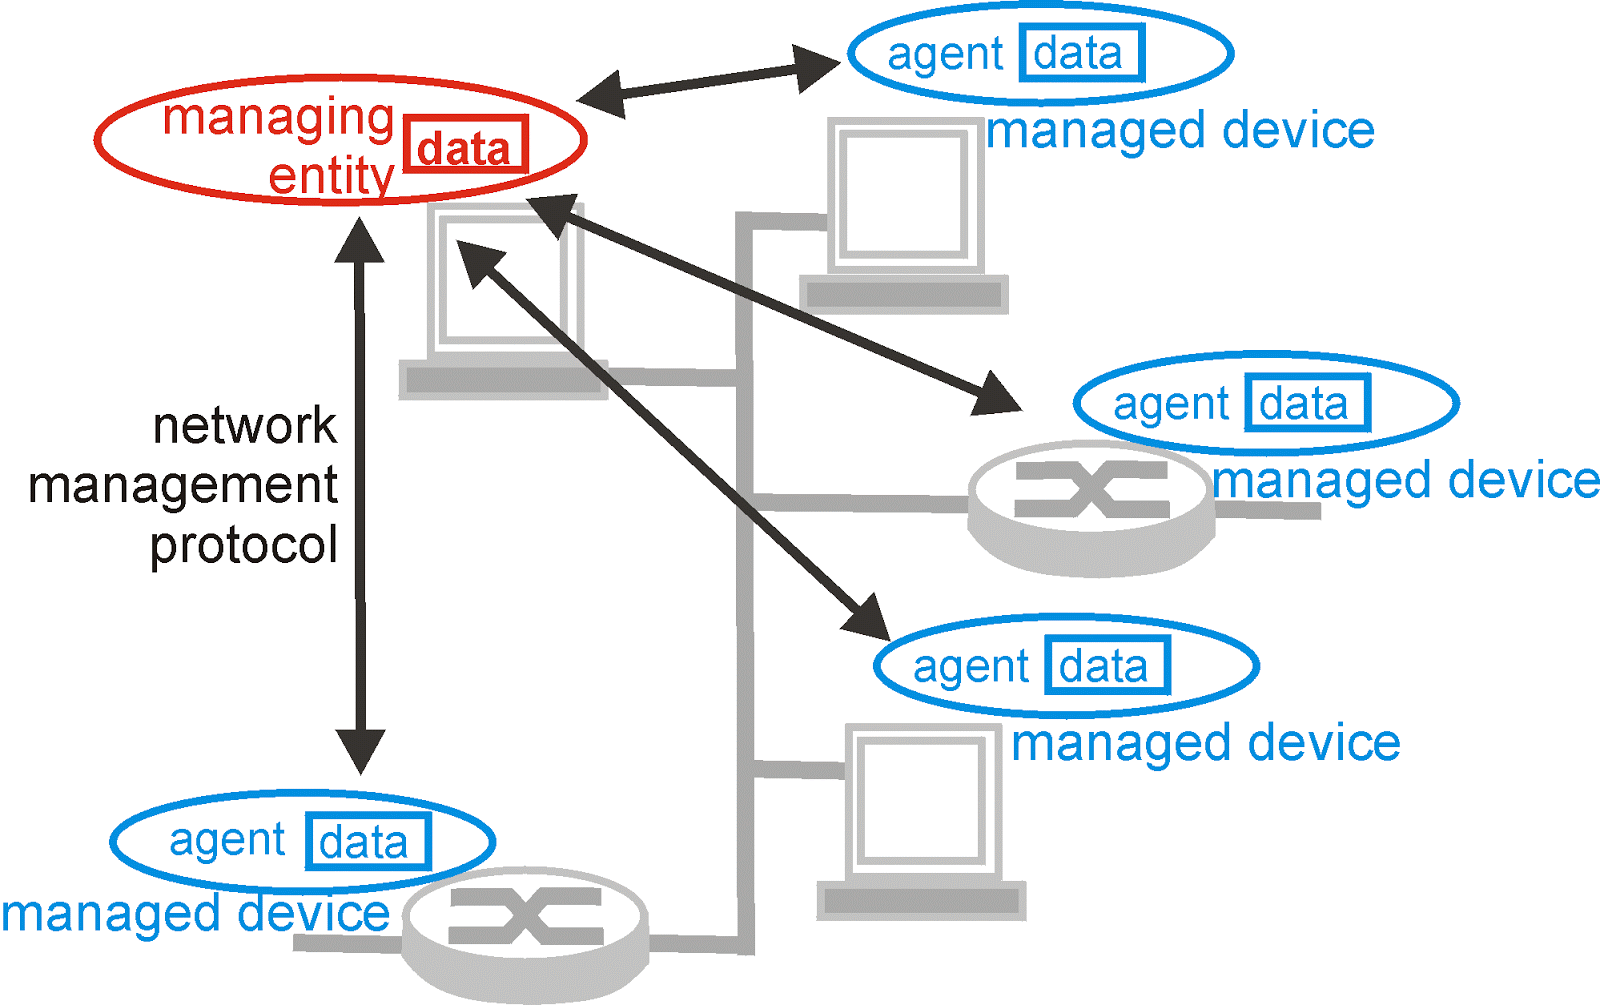
SNMP stands for simple network management protocol. Just like its name, it is used for network management. One of the benefits of SNMP from an ISP’s point of view is in its use to generate graph of bandwidth utilization for customers. SNMP uses UDP port 161 while SNMP Trap uses UDP port 162.
SNMP is commonly used together with network monitoring tools like PRTG and Cacti to graph and display users bandwidth consumption.
SNMP has different versions ranging from version one to version three. SNNPv3 is the latest and most secured version of SNMP. SNMP v1 and v2 use the community string for authentication and does not support encryption. By simply setting your community strings on the SNMP agent and SNMP manager to the same, communication will take place. SNMP v3 comes with MD5 or SHA authentication and uses DES for encryption.
Enabling SNMP on a cisco router is quite simple. Simply type in the commands below.
timigate(config)#snmp-server community timigate RO
timigate(config)#snmp-server enable traps entity-sensor threshold
That is how you configure SNMP on a cisco router. My community string is set to “timigate” while the action is read only. It could be set to read write depending on what you want to do. I am only setting this up for graphing traffic utilization. On the SNMP manager I MUST set the community to timigate for this to work. Most administrators leave it at public. This is a bad bad practice and should not be encouraged for security reasons especially when you are not running version 3.