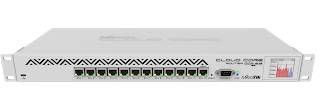
Mikrotik router OS is popular among wireless internet service providers. In recent times, Mikrotik has demonstrated its determination to take on industry big names like Cisco and Juniper by producing rugged enterprise routers capable of processing millions of packets per minute. Some of these high-end enterprise routers can be found among the Mikrotik Cloud Core Router series. While having a rugged router at the core of your network is highly recommended, the security settings required to keep the network behind it fully secured can never be over emphasized. In this post, we will look at 9 settings required on a Mikrotik router to keep the network secured.
Username: It is no secret that the default username on any Mikrotik is admin. While this was done for easy first-time access, it has been found that many network engineers do not change the default username on the router. This is the first step to exposing your router to unauthorized access which will ultimately lead to denial of service attacks. Change the default username from admin to something else; something not related to your organization but known only to you.
How to set username:
/user set 0 name=TimiGate
Password: The default password on a Mikrotik router is empty. You are to change this to something else. Use a password generator to formulate strong passwords for your routers.
You may also like: How to configure Mikrotik ip tunnel ( site to site VPN)
How to set password:
/user set 0 password=”!={Ba3N!”40TуX+GvKBz?jTLIUcx/,”
Restrict access to specific IP addreses: by default, Mikrotik routers have configurations that deny access to your router via the WAN port. Often times, network administrators/engineers would disable this feature to allow them remote access to the router. To keep the router secured while granting remote access to users, restrict access to specific IP addresses that will be used to access and administer the router from remote locations.
How to restrict access:
/user set 0 allowed-address=197.255.210.32/27
Update Winbox: Use latest version of winbox and be sure to tick the box for secure mode, especially when accessing the router from outside your network.
Disable all non-secured
services: Disable all non-secured services like telnet, http and so on.
/ip service disable telnet,ftp,www,api,api-ssl
Change the default ssh
port: This helps to prevent bruteforce attacks on the router through ssh port. The default port number for ssh is 22. You can change this to something else.
How to change ssh port:
/ip service set ssh port=2200
Disable mac telnet, mac
winbox and mac ping: Mikrotik allows mac telnet access to the router. As good as this is especially when your PC is not on the same network as the router and you do not want to change the IP address on your device before accessing the router, it can also provide an opening for unauthorized access to your router.
Disable mac telnet:
/tool mac-server set [find] disabled=yes Disable mac winbox:
/tool mac-server mac-winbox set [find] disabled=yes Disable mac ping: /tool mac-server ping set enabled=no
/tool mac-server mac-winbox set [find] disabled=yes Disable mac ping: /tool mac-server ping set enabled=no
Disable DNS cache: This feature, when used on a Mikrotik router, reduces the DNS resolution time for hosts on your network. I recommend that if you do not know how to set up firewall features that block DNS requests to your router from outside of your network, don’t enable it, else, your router becomes a public DNS server to anyone who can reach the public IP on it. When this happens, your upload traffics will be huge and ultimately eat up your entire bandwidth, causing your link to be slow. Apart from this, enabling DNS caching will leave you open to DNS attacks.
How to disable DNS
cache: ip dns set allow-remote-requests=no
Keep default firewall rules on: Mikrotik router boards have default firewall settings that protect the router from external attacks. It is recommended that you keep these rules on. Some of the tasks performed by the default firewall rules are listed below:
>>work with new connections to decrease load on a router;
>>create address-list for IP addresses, that are allowed to access your router;
>>enable ICMP access (optionally);
>>drop everything else, log=yes might be added to log packets that hit the specific rule;

