In this post, I will share with us on how to create read-only user accounts on a Cisco router. If you lead a team of network administrators, among them, those you want to only read configuration commands but not change anything, or you simply want to allow someone else access your router and help troubleshoot an issue without making configuration changes, then you need to create a read-only account for such a user. The read-only account will allow a user log in and read configurations without being able to make changes.
I will create a read-only account on a cisco router and apply it to the vty line. This will allow users access the router via ssh and read running configuration commands. Any attempt to issue commands other than the ones allowed for such users will be refused and an invalid message will be displayed.
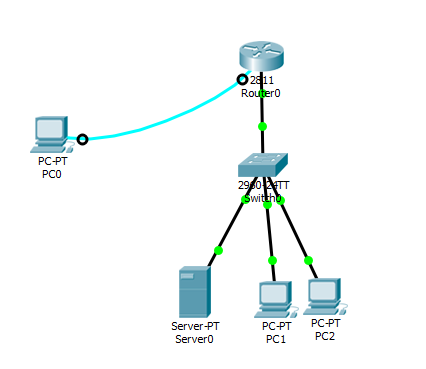
To accomplish this task, I will create two accounts; the administrator account with full access and the read-only account. I will then configure ssh and instruct the router to authorize vty logins with the local database. This task will be done using the Cisco Packet Tracer. The configuration is the same for live Cisco routers.
Network Topology

Create users in the local database
Router(config)#username superadmin privilege 15 pass cisco
Router(config)#username test privilege 3 pass cisco
You must have an administrator account with full access, then the read-only account. Level 15 is the highest while level 1 is the least. Next, we specify the privilege level available to the user.
Router(config)##privilege exec level 3 show running-config
Now, let us configure ssh and instruct the router to authorize ssh users using the local database
You may also like: How to perform Cisco password recovery on Cisco catalyst switch.
Router(config)#hostname Timigate
Timigate(config)#ip domain-name yourdomain.com
Timigate(config)#crypto key generate rsa
- Enter a value for rsa key. I used 1024
Timigate(config)#ip ssh authentication-retries 3
Timigate(config)#ip ssh time-out 3
Timigate(config)#line vty 0 4
Timigate(config-line)#login local
Timigate(config-line)#transport input ssh
Verification
To verify, I will log into the router via ssh using the read-only account and then try to go to the global configuration mode. See below.

You can see that an attempt to go to global config mode was refused and an “invalid input detected at ‘^’ marker.” message was displayed. But right after that, the ‘sh run’ command was issued and the running configuration on the router was shown.
If you enjoyed this tutorial, please subscribe to this blog to receive my posts via email. Also subscibe to my YouTube channel, like my Facebook page and follow me on Twitter. To get the Packet Tracer file for this lab, simply drop your email address in the comment section of this blog.

Wow! It’s great I’ll love to have more tutorials and posts directly in my mailbox
Thank you. The Lab for this post has been sent to your mail box. Please make sure you subscribe to this blog as well as my YouTube channel to get my latest posts.