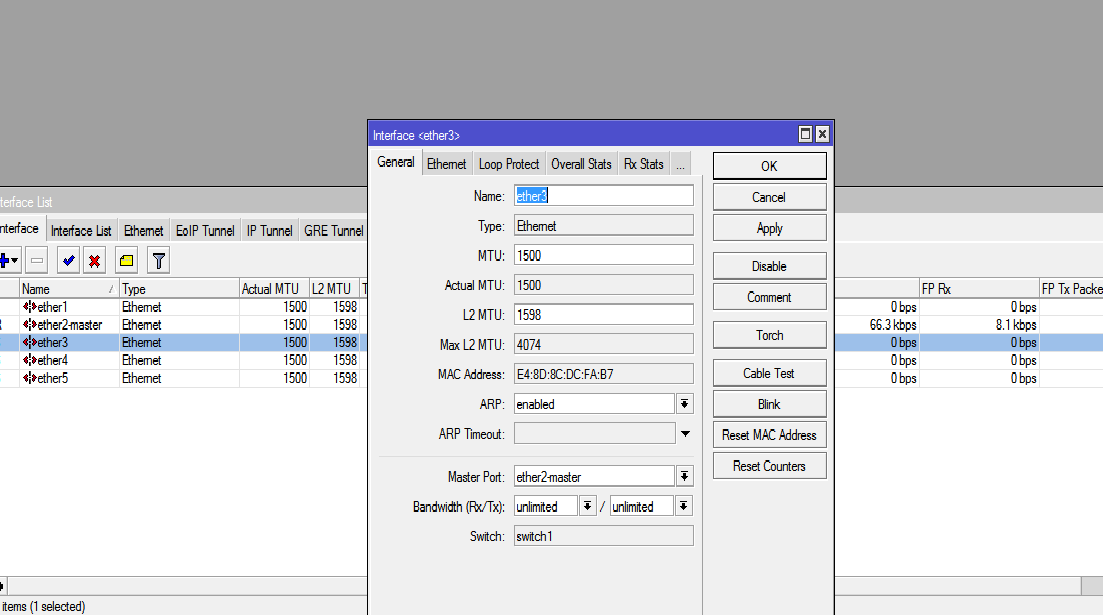
Part of the things Mikrotik has done to aid the deployment of their technology is the infusion of switching functions into routers. If you are used to Cisco technologies, you will know why this is such a big deal. Cisco layer 3 switches are quite expensive because they have routing and switching capabilities built into them. With Mikrotik, the need to purchase a switch is not always there as many ports have been bundled together in a master-slave setup, giving both routing and switching features altogether.
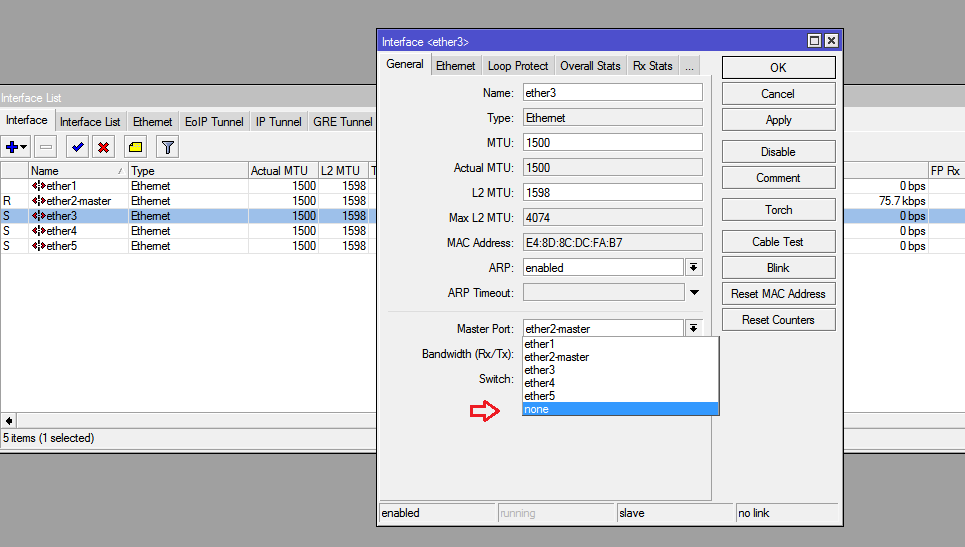
Repeat these steps for all ports you intend to make dedicated ports.
You can view the video below
If you enjoyed this tutorial, please subscribe to this blog to receive my posts via email. Also subscibe to my YouTube channel, like my Facebook page and follow me on Twitter.
Optimizing Metro Ethernet segments with jumbo MTU (Maximum Transmission Unit) can significantly enhance network performance…
MikroTik's SwitchOS is an operating system specifically designed for their line of network switches. It…
A properly configured VRRP setup does not only track device uptime but also tracks connection…
Network Address Translation (NAT) is a technique used in networking to map private IP addresses…
In the ever-evolving landscape of networking technologies, the demand for efficient and scalable solutions has…
Setting up Multi-Area OSPF (Open Shortest Path First) on Mikrotik routers involves a few steps.…
View Comments
Dear sir,
I didn't see master port option. Kindly guide me. I have rb2011 microtik router.
I will thankful to you if you guide me.
If there is no master port, check if there is a bridge interface, then click on port and remove those you want to separate.
Thanks for this. I was confused by the slave port and then ran into the same issue regarding the bridge taking all the ports. Once I opened the bridge and clicked on the ports tab, I was able to remove the port and then configure it as a DHCP client.
Great blog.