IPv6to4 tunneling: How to configure Generic Routing Encapsulation 6 (GRE6) for IPv6to4 tunneling on Mikrotik
In this post, I will be sharing with us on how to configure a generic routing encapsulation (GRE6) tunnel. If you find yourself managing an IPv4 network that is connected to an IPv6 service provider network, one of the options you have is to set up an IPv6 tunnel between your router and your ISP and then route your IPv4 packets to and fro the internet through the tunnel interface. It is easy and straight forward. Let’s go!
Image showing two connected sites via gre. Credit wiki.mikrotik.com
For this to be successfully implemented, you need to work with your ISP. You will configure your end of the tunnel on your router while the ISP handle theirs on the router the have provisioned for this kind of connection.
Setting up GRE6 tunnel
First, make sure that your WAN interface has been assigned an IPv6 address and that you can get to the IPv6 gateway address on your ISP side of the connection. With these conditions met, head on to the next phase.
Client’s Side:
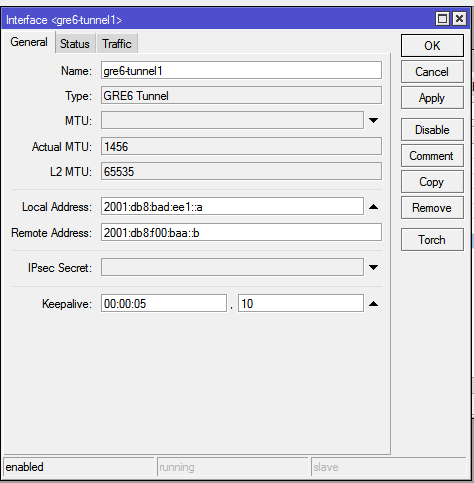
Click on the new terminal tab from the home menu and enter the below command, making sure that the local and remote IPv6 addresses have been changed to what you have.
Next, assign an IP address to the tunnel interface. This IP must be on the same subnet with the IP that the ISP will assign to their tunnel interface. See below: >> /ip address add address=172.17.17.1/30 interface=gre6-tunnel1
Note that the local IP must be the IPv6 address on the WAN interface of your router while the remote is the local IPv6 address on the ISP’s side of the connection. Your ISP will make this address to you.
ISP’s Side:
On the ISP side, they will do a reverse on what you configured above, in terms of local and remote addresses. See below:
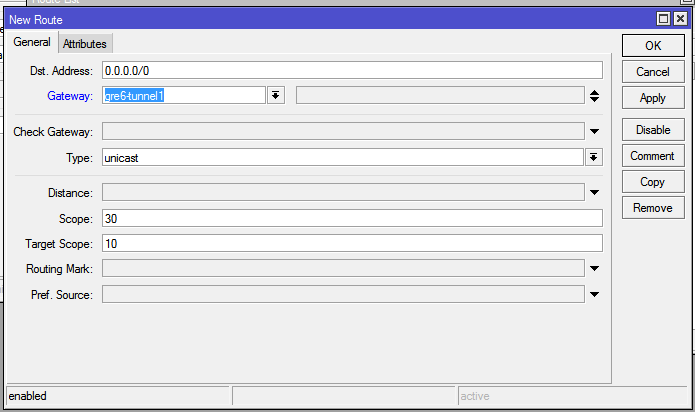
The ISP will configure a static route to reach your IPv4 network through the tunnel. See below:
IPv6 tunnel route
To test if the tunnel is up, ping the IP address on the tunnel interface on ISP GRE6 router. With the tunnel set up, the ISP cloud is unaware of what passes through the tunnel and with that, you can successfully route IPv4 packets originating from your LAN through the ISP’s IPv6 network. You can go a step further by encrypting the GRE6 tunnel using IPSEC. This must be done in agreement with your ISP. To see how to encrypt a GRE tunnel using IPSEC, click here.